[et_pb_section fb_built=”1″ admin_label=”section” _builder_version=”4.16″ background_color=”rgba(255,255,255,0)” global_colors_info=”{}”][et_pb_row column_structure=”2_3,1_3″ _builder_version=”4.16″ background_size=”initial” background_position=”top_left” background_repeat=”repeat” global_colors_info=”{}”][et_pb_column type=”2_3″ _builder_version=”4.16″ custom_padding=”|||” global_colors_info=”{}” custom_padding__hover=”|||”][et_pb_text _builder_version=”4.16″ background_size=”initial” background_position=”top_left” background_repeat=”repeat” global_colors_info=”{}”]
To facilitate rapid prototyping the department is equipped with 5 extrusion based 3D printers The 3D printers prints with PLA filament suitable for making small moving parts, thin walls and smooth surfaces. The printed models can be painted, drilled, machined, used for vacuum forming or as a negative shell (mould) for plaster or rubber casting. Machine specs:
- Volume: 210 x 210 x 200 mm
- Net Build Size: 180 x 180 x 180 mm.
- Model material: PLA
- Support material: Same as print material
- Accuracy: 0.1 mm.
- Layer resolution in the z-axis: 40 microns (= 0.040 mm.)
Using the 3D printer To use the 3D printers you need to contact Peter Skotte or Jens Munk, who will assist you in preparing your 3D models for printing and start up the printing process for you. When you have finished 1 print with supervision, you can use the Ultimaker Printers on you own. We have made a short and simple guide for you to follow in preparing your files for print:
[/et_pb_text][/et_pb_column][et_pb_column type=”1_3″ _builder_version=”4.16″ custom_padding=”|||” global_colors_info=”{}” custom_padding__hover=”|||”][et_pb_image src=”https://facilities.create.aau.dk/wp-content/uploads/Ultimaker2Extended.jpg” align_tablet=”center” align_phone=”” align_last_edited=”on|desktop” _builder_version=”4.16″ animation=”off” global_colors_info=”{}”][/et_pb_image][/et_pb_column][/et_pb_row][et_pb_row admin_label=”row” _builder_version=”4.16″ background_size=”initial” background_position=”top_left” background_repeat=”repeat” global_colors_info=”{}”][et_pb_column type=”4_4″ _builder_version=”4.16″ custom_padding=”|||” global_colors_info=”{}” custom_padding__hover=”|||”][et_pb_tabs _builder_version=”4.23.1″ background_size=”initial” background_position=”top_left” background_repeat=”repeat” global_colors_info=”{}”][et_pb_tab title=”Cura software” _builder_version=”4.23.1″ body_font=”||||” body_line_height=”2em” tab_font=”||||” tab_line_height=”2em” background_size=”initial” background_position=”top_left” background_repeat=”repeat” body_line_height_tablet=”2em” body_line_height_phone=”2em” tab_line_height_tablet=”2em” tab_line_height_phone=”2em” global_colors_info=”{}”]
Cura
For the Ultimaker 2 Extended and Ultimaker 2 Connect, you must use free Cura software to prepare (slice) your 3D print files. Cura quickly and accurately converts 3D models into 3D print files within seconds, showing you a preview of the print so you can be sure everything is as you would like it to be.
Installation
After downloading, open the installer and run the installation wizard to complete the installation. When you open up Cura for the first time, you will be asked to select the 3D printer that you have; select the Ultimaker 2 Extended. No other configuration is required and you can directly start using Cura.
Using Cura
The basic process of converting a 3D model to a print file in Cura is described below.
- Load a 3D model (STL, OBJ, DAE or AMF file) into Cura via the “Load” button.
- Choose your desired settings and wait for Cura to slice the model.
- When Cura has converted the file you can save the print file (GCode) via the “Save” button. If the SD card has been inserted it will directly save the file to the SD card.
- Remove the SD card from your computer – make sure to safely remove it – and insert it in your Ultimaker 2 Extended to start printing.
When using Cura for the first time you will see the “Simple” setup. This is perfect for beginners, but when you’re a more experienced user and want to have more control over the print settings you can also switch to the “Advanced” mode.
[/et_pb_tab][et_pb_tab title=”Beginners guide to Cura (2023)” _builder_version=”4.23.1″ _module_preset=”default” global_colors_info=”{}”]
[/et_pb_tab][et_pb_tab title=”Do not use glue” _builder_version=”4.16″ body_font=”||||” body_line_height=”2em” tab_font=”||||” tab_line_height=”2em” background_size=”initial” background_position=”top_left” background_repeat=”repeat” body_line_height_tablet=”2em” body_line_height_phone=”2em” tab_line_height_tablet=”2em” tab_line_height_phone=”2em” global_colors_info=”{}”]
In earlier versions glue was used to keep a better tack between the printed object and the bed.
This is not nessecary any longer, because we have installed “BuildTak“. Its a bonded adhesive that keeps the object on the build plate wihout and secondary bond (like glue)
When removing the print, please be carefull NOT to break the buildtak surface. Always keep the spatular flat and right on the surface.
[/et_pb_tab][et_pb_tab title=”CURA Manual” _builder_version=”4.16″ body_font=”||||” body_line_height=”2em” tab_font=”||||” tab_line_height=”2em” background_size=”initial” background_position=”top_left” background_repeat=”repeat” body_line_height_tablet=”2em” body_line_height_phone=”2em” tab_line_height_tablet=”2em” tab_line_height_phone=”2em” global_colors_info=”{}”]
[/et_pb_tab][/et_pb_tabs][et_pb_text _builder_version=”4.16″ background_size=”initial” background_position=”top_left” background_repeat=”repeat” global_colors_info=”{}”]
When the printing process is done the workshop staff will assist you in how to remove the support material. What can the Ultimaker “make” 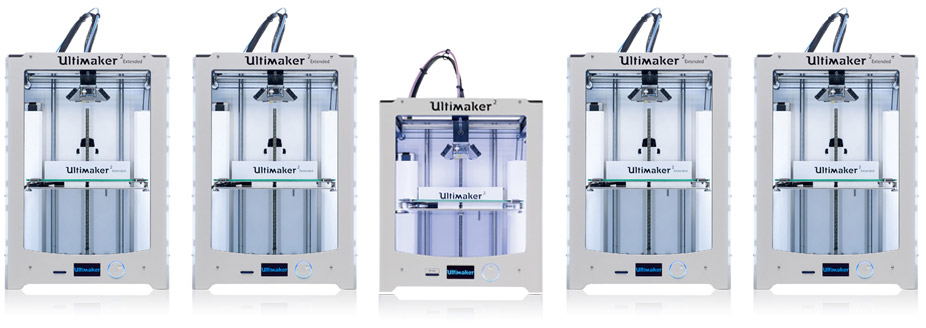
Booking and prices
The 3D printers are booked in the ADMT booking system you can see the availability of the 3D printers, and then make your own booking. If you’re a first time user of the booking system you need to register before being able to see the bookings. When registering it is very important that all the “required fields” are filled in correctly (the administrator will delete accounts that aren’t) as these fields are needed in the payment procedure which uses the personal printing account (used for normal printing at the department) to charge for all bookings.
The price for a 3D print depends on the amount of used material (both model and support material). Files need be in STL format. With Netfabb Basic, you can import the STL file and get an estimate on the volume. Exact prices can only be derived when the model is loaded in the 3D Printing software.
The printers are located in Rendsburggade 14, Room 5.153.
To use the printers, you need to book them via the booking system, and simply swipe your access card to the right of the 3d printers.
There is a booking fee of DKK 20,- for each booking you make (not hourly).
Filament and general use is free of charge for study/research related stuff.
[/et_pb_text][/et_pb_column][/et_pb_row][et_pb_row _builder_version=”4.16″ background_size=”initial” background_position=”top_left” background_repeat=”repeat” global_colors_info=”{}”][et_pb_column type=”4_4″ _builder_version=”4.16″ custom_padding=”|||” global_colors_info=”{}” custom_padding__hover=”|||”][et_pb_pricing_tables _builder_version=”4.23.1″ hover_enabled=”0″ global_colors_info=”{}” button_text_size__hover_enabled=”off” button_one_text_size__hover_enabled=”off” button_two_text_size__hover_enabled=”off” button_text_color__hover_enabled=”off” button_one_text_color__hover_enabled=”off” button_two_text_color__hover_enabled=”off” button_border_width__hover_enabled=”off” button_one_border_width__hover_enabled=”off” button_two_border_width__hover_enabled=”off” button_border_color__hover_enabled=”off” button_one_border_color__hover_enabled=”off” button_two_border_color__hover_enabled=”off” button_border_radius__hover_enabled=”off” button_one_border_radius__hover_enabled=”off” button_two_border_radius__hover_enabled=”off” button_letter_spacing__hover_enabled=”off” button_one_letter_spacing__hover_enabled=”off” button_two_letter_spacing__hover_enabled=”off” button_bg_color__hover_enabled=”off” button_one_bg_color__hover_enabled=”off” button_two_bg_color__hover_enabled=”off” sticky_enabled=”0″][et_pb_pricing_table featured=”on” title=”10 DKK” currency=”DKK” per=”Booking” sum=”10″ button_url=”http://aaumedia.onlinebooking.dk/booking/login.aspx” button_text=”Book a 3D Printer” _builder_version=”4.23.1″ hover_enabled=”0″ global_colors_info=”{}” button_text_size__hover_enabled=”off” button_one_text_size__hover_enabled=”off” button_two_text_size__hover_enabled=”off” button_text_color__hover_enabled=”off” button_one_text_color__hover_enabled=”off” button_two_text_color__hover_enabled=”off” button_border_width__hover_enabled=”off” button_one_border_width__hover_enabled=”off” button_two_border_width__hover_enabled=”off” button_border_color__hover_enabled=”off” button_one_border_color__hover_enabled=”off” button_two_border_color__hover_enabled=”off” button_border_radius__hover_enabled=”off” button_one_border_radius__hover_enabled=”off” button_two_border_radius__hover_enabled=”off” button_letter_spacing__hover_enabled=”off” button_one_letter_spacing__hover_enabled=”off” button_two_letter_spacing__hover_enabled=”off” button_bg_color__hover_enabled=”off” button_one_bg_color__hover_enabled=”off” button_two_bg_color__hover_enabled=”off” sticky_transition=”on” sticky_enabled=”0″][/et_pb_pricing_table][/et_pb_pricing_tables][/et_pb_column][/et_pb_row][/et_pb_section]